
Android RecyclerView Tutorial
The new support library in Android L introduced two new UI widgets: RecyclerView and CardView. The RecyclerView is a more advanced and more flexible version of the ListView. This new component is a big step because the ListView is one of the most used UI widgets. The CardView widget, on the other hand, is a new component that does not “upgrade” an existing component.
What is RecyclerView ?
The RecyclerView widget is a more advanced and flexible version of ListView. This widget is a container for displaying large data sets that can be scrolled very efficiently by maintaining a limited number of views. RecyclerView can be used for larger datasets to be rendered on the UI like a list. RecyclerView provides maximum flexibility to design different kind of views .
RecyclerView Features
– ViewHolder to store data that makes binding view contents easier .
– ItemDecorator to set special drawing and layout offset .
– SmoothScroller for smooth scrolling .
– LayoutManager (LinearLayoutManager,GridLayoutManager,StaggeredGridLayoutManager)
– By Default Animations while adding or removing an item .
Let’s Get it Working
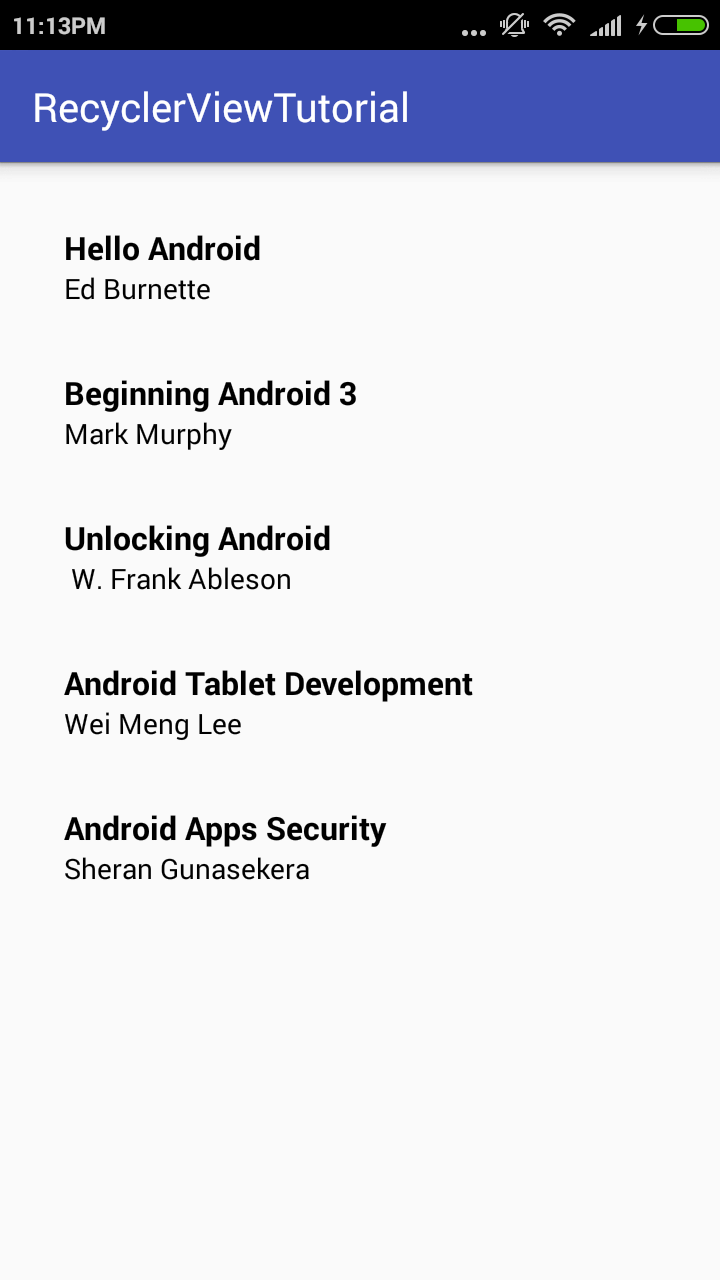
In this tutorial we are going to learn how to render a simple RecyclerView with a custom layout. We’ll also learn writing a adapter class, adding list divider and row click listener. The recycler view we are going to design contains list of books displaying the title and author .
Step 1 ) Update build.gradle file
Before you can use RecyclerView in your projects you need to add the following compile line to your Gradle dependencies block in your build.gradle file and rebuilt the project .
dependencies {
    ...
    compile 'com.android.support:appcompat-v7:23.1.1'
    compile 'com.android.support:design:23.1.1'
    compile 'com.android.support:recyclerview-v7:23.1.1'
}
Step 2 ) Modify activity_main.xml
<?xml version="1.0" encoding="utf-8"?>
<RelativeLayout xmlns:android="http://schemas.android.com/apk/res/android"
    xmlns:tools="http://schemas.android.com/tools"
    android:layout_width="match_parent"
    android:layout_height="match_parent"
    android:paddingBottom="16dp"
    android:paddingLeft="16dp"
    android:paddingRight="16dp"
    android:paddingTop="16dp"
    tools:context=".MainActivity">

    <android.support.v7.widget.RecyclerView
        android:id="@+id/recycler_view"
        android:layout_width="match_parent"
        android:layout_height="wrap_content"
        android:scrollbars="vertical" />

</RelativeLayout>
Step 3 ) Write Book model class
Create a class named Book.java and declare title and author. Also add the getter/setter methods to each variable.
package com.androidtutorialshub.recyclerviewtutorial.Model;

public class Book {

    private String title;
    private String author;

    public Book(String title, String author) {
        this.title = title;
        this.author = author;
    }

    public String getTitle() {
        return title;
    }

    public void setTitle(String title) {
        this.title = title;
    }

    public String getAuthor() {
        return author;
    }

    public void setAuthor(String author) {
        this.author = author;
    }
}
Step 4 ) List Row layout
Create an layout xml named book_list_row.xml with the below code. This layout file renders a single row in recycler view by displaying book title and author .
<?xml version="1.0" encoding="utf-8"?>
<RelativeLayout xmlns:android="http://schemas.android.com/apk/res/android"
    android:layout_width="match_parent"
    android:layout_height="match_parent"
    android:focusable="true"
    android:paddingLeft="16dp"
    android:paddingRight="16dp"
    android:paddingTop="16dp"
    android:paddingBottom="16dp"
    android:clickable="true"
    android:background="?android:attr/selectableItemBackground"
    android:orientation="vertical">

    <TextView
        android:id="@+id/title"
        android:textColor="@android:color/black"
        android:textSize="16dp"
        android:textStyle="bold"
        android:layout_alignParentTop="true"
        android:layout_width="match_parent"
        android:layout_height="wrap_content" />

    <TextView
        android:id="@+id/author"
        android:layout_below="@id/title"
        android:layout_width="match_parent"
        android:textColor="@android:color/black"
        android:layout_height="wrap_content" />


</RelativeLayout>
Step 5 ) Writing the Adapter Class
Create a class named BookAdapter.java and add the below code. Here onCreateViewHolder() method inflates book_list_row.xml. In onBindViewHolder() method the appropriate book data (title and author) set to each row.
package com.androidtutorialshub.recyclerviewtutorial.Adapter;

import android.support.v7.widget.RecyclerView;
import android.view.LayoutInflater;
import android.view.View;
import android.view.ViewGroup;
import android.widget.TextView;

import com.androidtutorialshub.recyclerviewtutorial.Model.Book;
import com.androidtutorialshub.recyclerviewtutorial.R;

import java.util.List;

public class BookAdapter extends RecyclerView.Adapter<BookAdapter.BookViewHolder>{

    private List<Book> bookList;

    public BookAdapter(List<Book> bookList) {
        this.bookList = bookList;
    }

    @Override
    public BookViewHolder onCreateViewHolder(ViewGroup parent, int viewType) {
        View itemView = LayoutInflater.from(parent.getContext())
                .inflate(R.layout.book_list_row, parent, false);

        return new BookViewHolder(itemView);
    }

    @Override
    public void onBindViewHolder(BookViewHolder holder, int position) {
            holder.title.setText(bookList.get(position).getTitle());
            holder.author.setText(bookList.get(position).getAuthor());
    }

    @Override
    public int getItemCount() {
        return bookList.size();
    }

    public class BookViewHolder extends RecyclerView.ViewHolder {
        public TextView title;
        public TextView author;

        public BookViewHolder(View view) {
            super(view);
            title = (TextView) view.findViewById(R.id.title);
            author = (TextView) view.findViewById(R.id.author);
        }
    }
}
Step 6 ) Binding Adapter and RecyclerView
Open MainActivity.java and update the below changes. Here initBookData() method sets the sample data to recycler view.
package com.androidtutorialshub.recyclerviewtutorial;

import android.support.v7.app.AppCompatActivity;
import android.os.Bundle;
import android.support.v7.widget.DefaultItemAnimator;
import android.support.v7.widget.LinearLayoutManager;
import android.support.v7.widget.RecyclerView;

import com.androidtutorialshub.recyclerviewtutorial.Adapter.BookAdapter;
import com.androidtutorialshub.recyclerviewtutorial.Model.Book;

import java.util.ArrayList;
import java.util.List;

public class MainActivity extends AppCompatActivity {

    private List<Book> bookList = new ArrayList<>();
    private RecyclerView recyclerView;
    private BookAdapter mAdapter;

    @Override
    protected void onCreate(Bundle savedInstanceState) {
        super.onCreate(savedInstanceState);
        setContentView(R.layout.activity_main);
        recyclerView = (RecyclerView) findViewById(R.id.recycler_view);

        mAdapter = new BookAdapter(bookList);
        RecyclerView.LayoutManager mLayoutManager = new LinearLayoutManager(getApplicationContext());
        recyclerView.setLayoutManager(mLayoutManager);
        recyclerView.setItemAnimator(new DefaultItemAnimator());
        recyclerView.setAdapter(mAdapter);

        initBookData();
    }

    private void initBookData() {
        Book book = new Book("Hello Android", "Ed Burnette");
        bookList.add(book);

        book = new Book("Beginning Android 3", "Mark Murphy");
        bookList.add(book);

        book = new Book("Unlocking Android", " W. Frank Ableson");
        bookList.add(book);

        book = new Book("Android Tablet Development", "Wei Meng Lee");
        bookList.add(book);

        book = new Book("Android Apps Security", "Sheran Gunasekera");
        bookList.add(book);

        mAdapter.notifyDataSetChanged();
    }
}
Run your app , you can see the books in list .


Enjoy Coding and Share Knowledge